Premium URL Shortener
Premium URL Shortener is a PHP script that allows you to run your own URL shortening website.
Documentation on how to set up and use Premium URL Shortener. This guide also cover all of its major features. If you stumble upon an issue or if you need help, please contact us.
License
Two types of license are available: Regular or Extended. If you are using Premium URL Shortener for multiple websites, you must buy a license for each of them.
Items purchased under a Regular or Extended License may NOT be redistributed or resold "as-is" or as part of any other collection of image resources or files. You do not own the software but simply own a license to operate it therefore the author of this item has full rights on this item.
Regular License Examples (from Envato)
Use, by you or one client, in a single end product which end users are not charged for. The total price includes the item price and a buyer fee. The Regular License could be used for the following:
- Single website (commercial, personal, or non-profit).
- Single website for a client (commercial, personal, or non-profit).
- Single intranet site project.
Extended License Examples (from Envato)
Use, by you or one client, in a single end product which end users can be charged for. The total price includes the item price and a buyer fee. The Extended License could be used for any of the following:
- An online service where the file can be displayed on multiple users' pages.
- Part of a software package for sale such as SaaS.
Requirements
Please review the requirements to ensure that the script runs smoothly and you can fully utilize all features. Most servers and hosts come prepackaged with the modules. Some hosts will provide you the option to enable or disable these via cPanel. If you are running your own VPS, you will need to install these.
| Server | Apache / NGINX / LiteSpeed |
| PHP | Minimum Version: 7.4 / Recommended Version: 8.1 - 8.2 |
| Database | MySQL Version: 5.7 - 8.2 / MariaDB: 11.0+ |
| PHP Modules/Extensions |
Required openssl php-curl php-json php-mbstring php-mysql php-dom php-xml php-zip php-gd php-iconvOptional but recommended php-imagick* php-bcmath*Latest version of ImageMagick with RSVG delegate and Imagick are required for advanced QR code manipulation like conversion to PDF and other formats. For more info, please check our FAQ. |
Installation
Premium URL Shortener comes with a quick installer. This is a guide on how to setup the script.
Using the Web Installer Video Tutorial
- Upload and extract "main.zip" to your server
- Make sure the follow files & folders/sub-folders are writable
config.sample.phppublic/content- including all sub-foldersstorage/- including all sub-folders
- Point your browser to http://yoursite.com
- The new document root is the
/publicfolder so we highly recommend to change the document root for your domain to/publicif possible otherwise we have added a .htaccess file to direct all traffic to the/publicfolder however on some servers it might not work. If you don't see the installer or you receive 404 errors, you will need to change your document path for your domain to make sure/publicis the final folder. - Follow the step by step instructions
- Login as admin using the credentials you set at step 3
- Click on "Admin Panel" button at the top and go to settings to configure the application.
The instruction above works on a typical server running apache and php. If you are using an NGINX server then you will need to manually update the NGINX config file for your domain using the file shipped with the product in the root folder. Similarly if you are using an IIS server, you will need to update your document root to /public and use the included file web.config to handle requests.
The automated installer will set up the database, create your configuration file and set up your administrator account. After this, all you have to do is to either go through this documentation to get yourself familiar with Premium URL Shortener or you can go ahead and experiment everything on your own and come back here if you have any issues. Also don't forget that if you have any problems, you can always contact us.
If you are having trouble installing, we offer installation services for regular hosts with a control panel like cPanel and VPS.
Upgrading
Please note that if you have customized the software's core and you proceed to upgrade, your changes will be lost.
All upgrading instructions are detailed in the new online dedicated changelog for Premium URL Shortener. You will find instructions according to the version of Premium URL Shortener. Please note that some updates may require you to replace all files while others only a couple of files. In both cases, it is strongly recommended that you first backup all of your existing files and download it to your computer.
View ChangelogUsing the AutoUpdater (v5.4+)
- Find your purchase code in the "Downloads" section of CodeCanyon.
- Go to the admin panel and in the left menu click on Update.
- If you are eligible to use the AutoUpdater, enter your purchase code and proceed.
It is strongly recommended to backup your files regularly as in rare occasion an update might not work with your server configuration and you need to roll back.
Migration
To migrate from one server to another, you need to proceed with care to not lose any data or functionality. Please follow the instruction below to letter without skipping anything to prevent loss of data.
- Enable maintenance mode in the admin panel settings.
- First backup and download all your files (compress and download)
- Go to phpmyadmin your database export the shortener database
- On your new server, go to phpmyadmin new database import the SQL file
- If you are changing your domain name, go to the settings table then change it under "url".
- Then on your new server, upload and extract the compressed files
- Open the file config.php and change your database info manually.
- Finally, login as admin and disable maintenance mode.
If you are having trouble migrating, our team can help you migrate safely!
Core Features
Redirection Options
Premium URL Shortener offers an advanced array of options to filter & optimize your traffic with the same short link.
Geo Targeting (States & Country)You can define a different url for different countries and states. For example, if you want to target people in New York, USA, you can define a different link for this group and all others will be redirected to the main url.
Device TargetingSimilar to the Geo Targeting, the device targeting allows you to target specific devices like different operating systems or mobile phones.
Language Targeting NewLanguage Targeting works in the same way as the previous options however it will redirect users based on their browser language.
Note At the moment there is a certain priority for these features. Language Device Geo. For example if you define both a Geo Targeting for New York to abc.com and a Language Targeting for English to xyz.com then the language targeting will be prioritized so users from New York with English set as their browser language will be redirected to xyz.com
Meta TagsYou can customize the meta tags for any long url. If you are using the Direct method, the custom meta tag change will be triggered if and only if you upload a custom meta image. For other redirection types, it will updated right away.
PixelsYou can assign custom Pixels for each short link. These pixels will be triggered upon redirection. Due to the nature of these pixels, a custom intermediary page is required so users will be waiting for 2 seconds before getting redirected to the target website.
Parameters & UTM BuilderYou can define custom parameters and UTM for each short link. These custom parameters will be added automatically to the long link. For example if you shorten https://gempixel.com and you set utm_source = email when a user clicks on the short link, the final url will become https://gempixel.com?utm_source=email
Dynamic Parameters/Parameter ForwarderThe script includes a dynamic parameter feature where it will automatically forward parameters to the final url. For example if you shorten https://gempixel.com and you get https://short.com/AXy12Z, you can assign parameters like https://short.com/AXy12Z?affiliateid=123 and the it will be forwarded to https://gempixel.com as https://gempixel.com?affiliateid=123
Redirection Types
Premium URL Shortener offers 5 types of the redirection that you can use. Each of them are explained below.
Direct RedirectionA direct redirection method redirects the user without any intermediate page. This is done via the server redirect. When sharing the link having a direct method, crawlers will fetch directly the target page. When using a pixel with direct method, a page is shown briefly before redirection and it is required for the pixel to work.
Frame RedirectionThe frame redirection method is useful when you want to cloak a website like an affiliate page. It will show bar at the top with the site information, an ad slot and some buttons to share or close the frame.
Note that some websites do not work with this method because of a security rule that forces browsers to hinder iframes.
Splash RedirectionThe splash page is an intermediate page very useful to give the user a preview of the page they are about to be redirected. It serves as a measure of protection and gives the user some time to react and decide whether they want to continue or not.
Custom Splash RedirectionThe custom splash redirect is a premium feature that allows customers to create their own promotional page and associate it to a short link. A user going through the custom splash page will see a promotional page briefly before being redirected.
Overlay RedirectionThe overlay feature is a cool feature that allows you to use dynamic lead widgets. It uses the same principal as the frame method but without the top bar. Instead it injects some cool widgets like a popup message, contact form and a poll.
Bio Pages
Premium URL Shortener allows you to generate Bio Pages where you can add your links and other widgets. You might be familiar with this feature if you have used Linktree or other platforms previously. You can enable Bio Pages in plans and choose how many users can generate.
Default Bio Page
You can set a Bio Page as default as access it via your username i.e. https://site/user/username. Just go to Bio Pages > Select the Bio Page and Choose Set as Default.
QR Codes
Premium URL Shortener allows you to generate advanced QR codes with different shapes and colors. You can enable QR Codes in plans and choose how many users can generate.
Advanced QR Codes
Advanced QR codes requires ImageMagick with the RSVG delegate. We recommend installing the latest version of ImageMagick from source and latest version of Imagick as older versions of ImageMagick is not optimal in terms of performance. The following tutorial shows you how to install ImageMagick and Imagick on a linux VPS. Please note that you will require root SSH access in order to compile and install everything.
Install latest ImageMagick & Imagick on managed VPS- Remove the old version of ImageMagick & Imagick
- Install Delegates & Modules. You will find the list in the here.
- Install ImageMagick from source. Run
./configure --with-rsvg --with-modulesinstead of./configure - Install Imagick from source
- Add
extension=imagick.sointo your php.ini - Restart the server
- To check if everything is enabled, you can go to Admin > Update > view phpinfo and search for Imagick
If you are having trouble installing it, our team can help you install them for you and get you up and running!
sudo apt-get update && apt-get install -y -qq \
build-essential chrpath debhelper dh-exec dpkg-dev g++ ghostscript gsfonts libbz2-dev \
libdjvulibre-dev libexif-dev libfftw3-dev libfontconfig1-dev libfreetype6-dev \
libjpeg-dev liblcms2-dev liblqr-1-0-dev libltdl-dev liblzma-dev libopenexr-dev \
libpango1.0-dev libperl-dev libpng-dev librsvg2-bin librsvg2-dev libtiff-dev libwebp-dev \
libwmf-dev libx11-dev libxext-dev libxml2-dev libxt-dev pkg-config pkg-kde-tools zlib1g-dev
Translation
You can easily translate almost every text in this application without the hassle of editing PHP files. Just login as admin, go to settings then click on "Languages" and follow the instructions. Please note that this feature may not work on some hosts due to memory limits. In this case you will need to follow the manual instructions below.
Manual Translation
Now you can easily translate most of the text in Premium URL Shortener. Language files are located (and have to be located) in storage/languages/<YOUR 2-LETTER LANGUAGE CODE>/app.php. Please note that some texts are too long to be translated this way, however you can do it another way (explained below). Once a user changes the language of the website, a cookie that includes the user's language preference will be set. If the user revisits the website, Premium URL Shortener will automatically read the cookie and switches the language.
How Translation Works
The process of the translation is pretty easy. All texts are stored in an array and then a function is used to read and assign the proper translation of the text. If you open one of the PHP files, you will notice a lot of echo e('TEXT'). The function e is the function that reads and assigns everything. The name of the translation file is the language code of your language e.g. fr.php the code is fr for French. To use it simply, add to any link ?lang=LANGUAGECODE in this case ?lang=fr
Translating Texts
If you go in the storage/languages/ you will notice a file named "sample.php" where sample.php is a translation-ready file and is used to generate language packs in the admin panel. If you want to understand how translation work, open "sample.php" and have a look at it. You will notice the following format (only the blue part must be changed):
The most important things to remember are the following:
- Do not delete
array(and);at the end. - Do not edit the left side, if you edit it then translation will not work anymore
- Do not forget to add a double-quote before and after, if you do, the site will crash
- Do not forget this "
=>", if you do the site will crash - And finally, do not forget the comma at the end
Translating other Parts
If you want to translate some parts that are yet to translate, do as following.
- Open the file that contains the text
- Wrap the text with this: <?php echo e('TEXT')?>
- Open your language file and then add anywhere "TEXT" => "TRANSLATED TEXT",
"About" => "TRANSLATION OF ABOUT",
Translating Custom Pages
To translate custom pages, simply choose the language in the dropdown menu. The script will automatically display associated pages when users change the language.
<?php echo e('Consequat aliquip do tempor velit esse in proident anim culpa sed nulla.') ?>"Consequat aliquip do tempor velit esse in proident anim culpa sed nulla." => "Translated string in any language you wish","data" => [
"Consequat aliquip do tempor velit esse in proident anim culpa sed nulla." => "Translated string in any language you wish",
"Dolore occaecat nisi tempor cillum dolore in mollit excepteur in aliqua culpa sunt enim pariatur dolore ullamco consequat culpa." => "Translated string in any language you wish",
];Themes
The theming system has been greatly simplified to allow easy customization. All themes are located in the folder storage/themes. If you open the default theme file you will see many files in that folder. Those are all the theme files you can modify. The folder named admin includes some important files that you should not modify unless you know what you are doing.
Using the editor
Premium URL Shortener has a powerful theme editor built-in. The theme editor includes a code editor that you can use to easily change things. The code editor (ACE) is set to format only HTML and CSS. It will NOT format PHP. All php codes will be treated as text. You should not touch any PHP code unless you have the knowledge. There are some codes you can edit and these are explained below. You also have the ability to clone a theme by clicking on the clone button. You cannot however delete a theme from Premium URL Shortener. You will need to do this by deleting the folder manually. This feature was not implemented because the deletion process is very sensitive and differs from server to server.
Add new theme
You can upload the .zip via the admin panel or upload and extract the .zip file in storage/themes/
Child Themes
You can now create child themes very easily without worrying about updates. You can now change only what you want and Premium URL Shortener will fallback on the default theme for other components which will always be up-to-date. The steps are very simple:
- Copy or clone the default theme located in storage/themes/
- Open the file config.json located in the new copy of the theme
- Find
"child":false,and change that to"child":true, - Browse to the new directory and delete everything you don't want to change, except config.json. For example if you only want to change the homepage, delete everything but index.php and config.json.
- Go to the admin panel themes and activate the new Child Theme and voila.
- Now you can make any changes you want and it will always be there.
New If creating a child theme for another theme than the default theme, you need to set the theme folder name as the value of "child". For example if you are creating a child theme for The23 theme or SaaS, you can set the "child":"the23" or "child":"saas", respectively.
Do not delete the default theme from Premium URL Shortener! This will be used as fallback.
We highly recommend you delete the /admin folder in the new theme folder as we update it very frequently. By deleting it, Premium URL Shortener will fallback and use the one located in the /default folder which will always be up-to-date. Similarly delete anything you are not using so it is always up-to-date.
Similarly, if you are creating new themes for Premium URL Shortener you can keep anything you need and delete everything else but this with child parameter back to false.
Theme Settings
Each theme comes with its own settings that you can find in Admin Themes Settings. For example the default theme comes with options to add custom menu, change color scheme and even set a custom color for your site!
Channels
Channels are great for organizing your links, qr codes and bio pages. You can quickly access them when needed directly from the sidebar when you star the channel.
To create a channel and add a link
- Create your channel in My Channels
- Check links you want to add to the channel, then click on the box/package icon.
- For QR codes and Bio Pages, you can add them by clicking the
- You will see the channels in a dropdown menu.
- If you don't see any channels, you will need to create one first.
Campaigns & Link Rotator
The campaign feature allows you to regroup some links and will generate you a special link where you will be able to send that to people. That special link will allow them to see all links in the campaign and use them. Campaigns also aggregates statistics for all links in that campaign.
To add a link to a campaign:
- Check links you want to add to campaign, then click on the icon.
- You will see the campaigns in a dropdown menu.
- If you don't see any campaigns, you will need to create one first.
Campaign List
To access and share a campaign list, you need the following settings for the list page to be generated. This is because the list page will use the same appearance as the default profile.
A Bio Page set as Default: Bio Pages Set as Default The account status set to public in User Dashboard Settings
Links Rotator
This new feature allows a campaign to act as a rotator. The special link will rotate links randomly and will send the user to short link within the campaign.
Pixels
The pixels tracking are used by ad platforms such as Facebook and Google Ads to allow you to gather data on your customers and how they behave on your website. By adding your pixel ID from either of the platforms, you will be able to optimize marketing simply by using short URLs.
To add a pixel:
- Under the Pixel page, add your desired pixel including a name and the pixel ID
- When shortening or editing a link, click on advanced option, browse to the end of the block and you will see an option to select the pixel
Verifications
Your users can now submit a document to get verified. You can also verify any user from the admin panel. Verified users will have a trusted status, meaning they will have verified badge on all of their Bio Pages and if you have "Manual Link Approval" enabled, their links will be automatically approved. You can manually verify any user by just clicking on Verify User in the admin panel.
You can turn off the verification system in Admin > User Settings
Team Feature
The new team feature allows you to invite members to your group and operate the same account as a team. This is perfect for collaboration! To use this feature, the team leader must invite users and users will need to accept the invitation via email and create an account. Once the account has been created, members can access the same environment as a team member.
Since version 6.8, team members can have their own account as well as be part of the one or more teams. The environment can be changed by clicking the icon at the top right next to the notification icon.
To add a user to a team:
- Under Team, enter the member's email
- Choose permissions
- Send Invite
- User will receive an invitation. If they don't have an account, they can create now but if they already have an account, they need to login and access the invitation
Permissions
Please note that the team members are only allowed select permissions.
Tracking
Premium URL Shortener offers two methods of tracking (and you can disable this): System and Google Analytics. When choosing the system method, Premium URL Shortener will tracking users on its own and log data in the database. On the other hand, when choosing Google Analytics, Premium URL Shortener will inject a Google Analytics code during the redirection. Please note that some features are not available when using Google Analytics.
System analytics, when receiving high traffic, can be very resource intensive however there are tools built-in to relieve the database of old or inactive links. We recommend using a VPS. We offer managed hosting starting at $20 per month where we take care of everything.
Caching
Premium URL Shortener nows offers caching of data. Caching is turned ON by default and can be turned off via the file config.php. Data is cached using phpFastCache and is stored in the tmp folder (where cookies are stored) or in the storage/cache/ depending on your server configuration. Cache must be turned on to throttle requests such as API requests.
Security
Premium URL Shortener uses some of the most advanced algorithms to keep the user account safe and your URLs phish-free. Passwords are hashed using the phpPass library which is currently one of the best solutions. All URLs go through a series of validation as stated below:
- URL Format
- CAPTCHA Check (reCpatcha V3: https://www.google.com/recaptcha/)
- Bot Check
- Keyword Blacklisting
- Domain Blacklisting
- Google Safe Check (API required: https://developers.google.com/safe-browsing/ )
- Phish-Tank Check (API not required but recommended because requests will limited: http://www.phishtank.com/developer_info.php)
Google Web Risk
Google Web Risk (WR) API is now mandatory for commercial usage. The once free Google Safe Browsing API is now only allowed for personal usage. As WR is currently in beta, you will need to sign up for a beta key on this page. After you have been accepted, follow the instruction below to activate WR. Please note that Google WR requires an active billing account otherwise it will not work! A video will be uploaded very soon.
- Go to your Google Developer Console
- In side menu, click on "APIs & Services"
- Click on "ENABLE APIS AND SERVICES"
- Search for "Web Risk"
- The click on Enable once found
- Once enabled, click on the menu button at top left corner
- Mouse-hover on APIs and Services and in the sub-menu you will see "Credentials". Click on that.
- Click on "Create Credentials" and generate an "API key"
- Copy that API key in Premium URL Shortener's admin panel to activate Google WR
Affiliates
Premium URL Shortener version 6.0 now includes an affiliate tool for users. Users can share their affiliate link and earn commission on the first successful payment. You can set the commission and terms of the affiliate in the admin panel. You can also set the minimum payout rate. Once a request for withdrawal is made, you can review everything and you will need to manually send the payment. Users will be asked to enter their paypal email.
Sitemap
Premium URL Shortener has a built-in sitemap that displays important urls such as homepage, custom pages, contact page, faqs, blog posts and public urls. The sitemap can be accessed via https://yoursite/sitemap.xml
You can disable sitemap in the app/config/app.php. You can also keep it enabled but disable public links in the same file
Cron Jobs
You can find the list of cron jobs to setup in Admin > Cron Jobs. You will need to set them up according to your environment. If you use cPanel, you can easily add the via cPanel > Cron Jobs.
CDN & Object Storage
As of version 6.7, you can directly upload files to Object Storage providers such as AWS, Digitalocean, Vultr, Cloudflare, Wasabi and Contabo. New uploaded files will directly be upload the selected provider and a CDN url will be used.
Please note that if you have a lot of files in the content/ folder, the sync feature might timeout due to server settings. In this case, it is recommend to zip the content folder, download to your computer, extract it and upload all files via the provider's website.
AWS S3
- Create a new Bucket
- Under Object Ownership Select ACLs enabled then choose "Bucket Owner Preferred"
- Under Block Public Access settings for this bucket, uncheck Block all public access
- Click Create bucket
- Copy your bucket name, bucket region and your API credentials in Security Credentials > Access Keys
- Save Premium URL Shortener settings
- If you are using the cloudfront CDN or your own domain mapped to the Cloudfront CDN, you can add the CDN url as well
- If everything checks out, you will see the Sync button with which you can sync all current uploaded files
If you sync files and they are not uploaded, double check your Access Key.
If you cannot access your files via the URL, check your permission settings.
Digitalocean Spaces
- Create a new Space in Digitalocean
- Choose you region
- Under CDN, you may decide to enable it or not
- Under Allow file listing?, choose Restrict File Listing
- Select your name & create
- After it has been created, go to your Space > Settings
- Under Endpoint, you will see your endpoint which looks like {{REGION}}.digitaloceanspaces.com - Copy the region & space name to Premium URL Shortener.
- Grab your Space Access Keys from API and paste them as well
- Save Premium URL Shortener settings
- If you are using the CDN or your own domain mapped to the CDN, you can add your CDN url as well
- If everything checks out, you will see the Sync button with which you can sync all current uploaded files
Cloudflare R2
- Go to Cloudflare > Your Website > R2 > Create a Bucket
- Click on your Bucket > Settings
- Under Public Access > Allow Access
- You can choose to map your own domain if you wish
- Copy the Public Bucket URL and paste it under CDN URL/Endpoint in Premium URL Shortener
- Go back to R2, copy and paste your Account ID in the region field and your bucket name in the bucket field in Premium URL Shortener
- Go back to Manage R2 API Token > Create API Token
- Under Permission, choose Edit: Allow edit access of all objects and List, Write, and Delete operations of all buckets
- Copy your Access Key ID and Secret Access Key in the appropriate fields and save Premium URL Shortener settings.
- If everything checks out, you will see the Sync button with which you can sync all current uploaded files
BackBlaze B2
- Go to BackBlaze > Buckets > Create a Bucket
- Choose a unique name and set the Files to Public and disable Object Lock
- Copy your bucket name to Premium URL Shortener Settings
- Grab the region from the BackBlaze Endpoint e.g. s3.REGION.backblazeb2.com
- Go to App Keys
- Create a New Application Key and choose Read and Write and allow access to All Buckets
- Copy Key ID and Key Secret to Premium URL Shortener
- If everything checks out, you will see the Sync button with which you can sync all current uploaded files
Vultr Objects
Follow the same steps as Digitalocean Spaces
Contabo Storage
Follow the same steps as AWS s3
Deep Linking
As of version 7.2, you can use enable deep linking to force open apps on mobile. To enable deep linking:
- Enter a main link that will be used for other devices
- Choose Deep Linking from the shortener menu and enable it
- Enter links to the respective appstore for your app
- In the device targeting, choose the correct device (e.g. iPhone, iPad or Android) and enter the appropriate app url
- Shorten your link
- Now users who click on the your links will be redirected to the app if installed otherwise they will be asked to install the app first.
Developer Tools & Integrations
Slack Integration
You can now integrate Premium URL Shortener to Slack and allow users to shorten directly urls from slack. To enable Slack, please follow the instructions below.
- Go to Slack Developer and create or login to your account.
- Under Your Apps, create a new App
- Set a Name and choose one of your Slack Workspace for testing
- Under Add features and functionality, choose Create New Command
- Define a command
- In the Request URL add the following (with your own site),
https://YOURSITE/webhook/slack - Set a short description (this will be seen by your users)
- Under OAuth & Permissions, set a redirect URL which essentially your domain name.
- Finally, Go to Basic Information and copy your credentials to Premium URL Shortener admin panel settings integrations
- Make sure to use the same command that you set in 4.1
- You can fill in the Display Information if you wish
- You will need to distribute your app so others can use it.
Now your customers can directly shorten links from slack using the command and the short links will be saved in their account.
Command Example

Result
Zapier Integration
Your users can now add a Zapier Webhook to automate workflows directly from the Tools Zapier Integration section and Premium URL Shortener will ping the webhook with data upon new url creation or a new visit.
NoteAlthough this is intended to work with Zapier, it can work with any webhook system. You can even define your own webhooks as well.
Social Login
Premium URL Shortener includes authentication methods from 3 major social networks such as Google, Twitter and Facebook. Before you can use any of these, they will need to be setup. Follow the instructions below to the letter otherwise it might not work.
oAuth logins are very strict with the Callback URL. Make sure to respect the oAuth callback mentioned under each of the social network below.
Facebook Login Video Tutorial
Users can login with their Facebook and bookmark their favorite sites. To set up your app, first go to https://developers.facebook.com and set up a new app by clicking "Apps". Then click "Create New App"; Facebook will ask you to configure your app. The most important fields you must fill out are App Domains and Site URL. For the oAuth Callback, add https://yoursite.com/user/login/facebook. Following that Facebook will generate two keys for you. Go to the admin settings and paste those keys. That's it. If you did everything correctly Facebook connect should work.
Callback URL
https://yoursite.com/user/login/facebook
Twitter Login Video Tutorial
Users can login using twitter the same way they use facebook. You must enable twitter connect for it to appear and function. You can do that on the admin panel. You must register your website on Twitter.com
- Go to https://developer.twitter.com/en and login.
- Click "Create Project" if you don't have a project already
- Click "Create App" and fill in your app name. This can be your site name or company name
- Twitter will generate your keys. Copy them to Premium URL Shortener admin panel User Settings
- Copy your Callback URL and proceed to App Settings on Twitter
- Enable OAuth 1.0a
- Enable Request email from users (optional)
- Under App Permissions choose Read
- Fill the required fields including the callback URI field:
https://yoursite.com/user/login/twitter, accept the terms and conditions and click "Save".
If you did everything correctly, Twitter OAuth should work. If it doesn't, send us an email and we will help you.
Callback URL
https://yoursite.com/user/login/twitter
Google Login Video Tutorial
Google connect protocol has been changed due to restrictions from Google. For this reason you will need to set up Google connect again. Simply follow the instructions below and it should be fairly simple.
- Go https://code.google.com/apis/console and login using your Google Account
- On the left side click "Credentials"
- Then click "Create new Client ID" to open the popup
- Select "Web Application"
- Add your domain name as "https://yoursite.com" under Authorized Javascript Origins
- Add the URI to Google Login under Authorized Redirect URI as
https://yoursite.com/user/login/google - Generate a public key and client secret and add those in the admin panel
Callback URL
https://yoursite.com/user/login/google
Membership
Premium URL Shortener now offers a membership system where users can upgrade their account for a fee to use some pro features such as the custom splash page. The features that are only available to pro users are custom splash page, ability to choose the redirection type, ability to use premium aliases (set by admin), no advertisement site-wide. The fees are set via the admin panel and discounts are calculated manually. You will need to activate IPN in your PayPal account and use the following URL as the IPN receiver: http://yoursite.com.com/ipn (if you have SSL enabled make sure to use https).
For PayPal Basic Checkout, make sure the option "Block Non-encrypted Website Payment" is turned OFF.
- Login to your PayPal account
- Profile > Profile and Settings
- Click on Website Payment Preferences
- Search for Encrypted Website Payments
- Change the settings Block Non-encrypted Website Payment from ON to OFF.
For Stripe, please check below for instructions on how to set it up.
Once the user clicks upgrade on top, the system will redirect to the upgrade page and will offer the plans set in the admin panel in either monthly and yearly. They will then be redirect to PayPal where they can login to pay or be able to checkout directly on the site when Stripe is enabled. Once the payment has been made, the user will be redirected back and the changes will be made to the account.
Expiration
The system will automatically switch the user from Pro to Free if the account has not been renewed. This will also temporarily disable all custom splash pages. Since a subscription system is currently unavailable, the user will need to renew the account every month or opt-in for the yearly plan.
Plans
Version 5.3 adds custom plans where you can choose the different options for each plan. You can even add a free plan which will be associated to free users upon registration. You can choose the plan title, description, prices (monthly and yearly), and add different restrictions such as limited splash pages or custom domain names.
If you don't plan to offer a free plan, users will be forced to upgrade to a plan after registration.
If you are using Stripe, you need to add your API keys before creating plans otherwise Premium URL Shortener will not create plans on Stripe. If you have added the API keys after creating plans, you will need to use the Sync button in Plans pages (top-right) to sync plans.
Coupons
Version 5.8 adds the possibility to add coupon and have users redeem them. You can easily add a coupon via the admin panel. At this moment coupons can only be added when you have Stripe enabled. By default, the discount on the plan via the coupon is applied for a maximum of 12 months and the subscription will be switched to the full price after.
Trials
Version 5.8 adds the possibility to add a trial to each paid plan. Trials are automatically applied without the need for a credit card. After the trial expires, the user will be switched to a free plan if available or be forced to upgrade. Users can upgrade at any time during their trial period.
Tax Rates
You can now define custom tax rates for each country. The tax rate will be applied automatically based on the billing address country.
Stripe
Version 5.0 has Stripe built-in. This will allow to painlessly subscribe customers and charge them automatically. Everything will be managed by Premium URL Shortener. This means payments, subscriptions, cancellation and refunds are managed so you don't have to worry. A video will be online soon to explain on how to activate Stripe. Meanwhile you can use the instructions below.
Please note that subscription requires an Extended License.
Activating Subscription
- Login to the admin
- Go to the subscription tab
- Enter your extended purchase code to activate it
Setting up Stripe
- Create a free stripe account
- Activate your stripe account
- Go to the API tab
- Generate a Publishable key
- Generate a Secret key
- Then go to Webhooks
- Click on Add endpoint
- In the "URL to be called section", add
https://yoursite.com/webhook - Select and add all
Chargeevents - If you are using Stripe Hosted Checkout, Add
customer.subscription.createdandcustomer.subscription.updatedas well - Once your webhook is created, click on that
- Then at the bottom you will see a "Signing secret" block. It starts with
whsec_ - Add your Keys and your Signing secret key in the admin panel to activate subscription.
- If you already have plans created, you will have to delete them and create new plans so it can sync with Stripe.
Note You will need to sync plans when going from Test Mode to Live Mode.
PayPal API
If you cannot use Stripe, Premium URL Shortener also allows you to use PayPal API. You will need to setup your account first.
Please note that subscription requires an Extended License.
Activating Subscription
- Login to the admin
- Go to the subscription tab
- Enter your extended purchase code to activate it
Setting up PayPal API
- Create a free paypal account or use your existing paypal login
- Create a new app in "My apps & credentials" tab - Make sure to choose "Live"
- Add your Client ID and your Secret key in the admin panel to activate subscription.
- If you already have existing plans, you can use the sync feature in Plans to sync plans with PayPal
Paddle Payments
Paddle is now integrated within Premium URL Shortener. Please follow this guide to set up it. You do not need to sync your plans with Paddle however you need to create two dummy plans that will be used for other plans. It is also recommended to set your tax calculation to be inclusive within Paddle and let Premium URL Shortener calculate taxes for you.
Please note that subscription requires an Extended License.
Setting up Paddle
- Create a free Paddle account or use your existing Paddle login
- Go to Developer Tools > Authentication and copy your vendor_id and the Default API Key and paste them in the Premium URL Shortener admin panel in their respective area.
- Go to Developer Tools > Public Key and copy your Public Key and paste it in the Premium URL Shortener admin panel in its respective area.
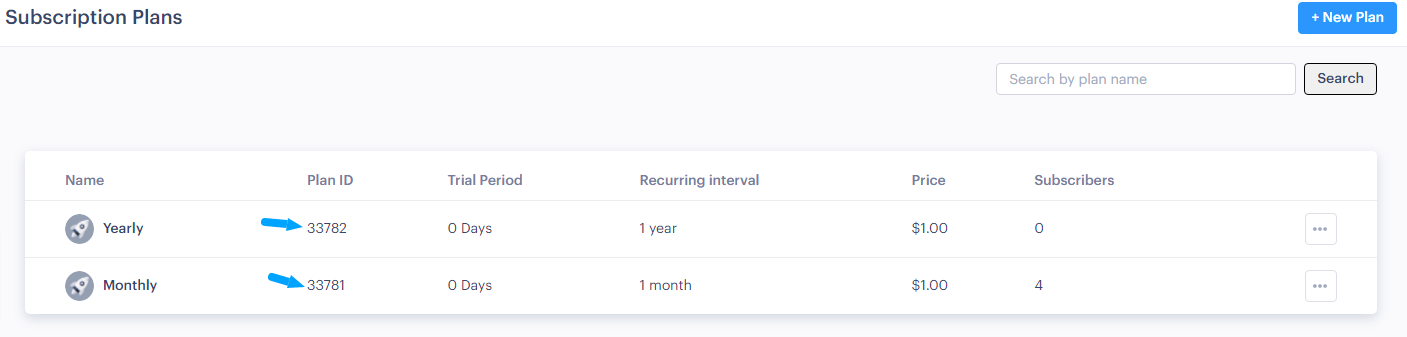
- Go to Catalog > Subscription Plans and create two plans: Monthly plan with $1 price and all currencies and Yearly plan with $1 price and all currencies.
- Copy their respective Plan ID, as shown below, and paste them in their field in the admin panel Paddle settings.
- Go to and enable Webhook for
Subscription Created,Subscription Updated,Subscription Payment SuccessandPayment Failed
Important For Paddle to work correctly, you need to verify your account, request a domain approval for your domain and ask Paddle to enable Checkout otherwise Paddle will not work.
Paystack
Paystack plugin is now integrated with Premium URL Shortener and it allows you to collect payments and subscriptions. It supports Monthly, Yearly and Lifetime Subscriptions as well as Taxes and Coupons.
Please note that this plugin requires an Extended License for Premium URL Shortener.
You will need to sync plans when going from Test Mode to Live Mode.
Setup Paystack
- Go to Admin Settings Payment Gateway
- Scroll down and you will see Paystack Payments
- Enable it and fill the information
- Create an account at https://paystack.com/
- You can find your API keys at https://dashboard.paystack.com/#/settings/developers
- Add the specified webhook at https://dashboard.paystack.com/#/settings/developers
- Save Settings
- If you have previous plans, make sure to Sync Plans. Paystack option will show up as Credit Card in the checkout page. Do not enable Stripe if using Paystack.
Plugins
This section is the documentation for various plugins. Some of these are paid plugins and others are free.
How to update plugins?
To update plugins, just reinstall the plugin by uploading it and it will be updated automatically. Plugin settings and your data will be safe.
Razorpay Plugin Paid
Razorpay plugin is a paid plugin for Premium URL Shortener that allows you to collect payments and subscriptions. The plugin supports Monthly, Yearly and Lifetime Subscriptions as well as Taxes and Coupons.
Please note that this plugin requires an Extended License for Premium URL Shortener.
You will need to sync plans when going from Test Mode to Live Mode.
Install Razorpay Plugin
- Extract the zip file downloaded from codecanyon
- Go to your site Admin Plugins All Plugins
- Click on Upload and upload the file named razorpay.zip
- Click on the three dots then Activate
If for some reason, the uploader does not work for you, you can manually extract the file crypto.zip in storage/plugins/. Make sure the content is in a folder named razorpay. You can then activate it in the admin panel.
Setup Razorpay Plugin
- Go to Admin Settings Payment Gateway
- Scroll down and you will see Razorpay Payments
- Enable it and fill the information
- Create an account at https://www.razorpay.com/
- You can find your API keys at https://dashboard.razorpay.com/app/keys
- Add the specified webhook at https://dashboard.razorpay.com/app/webhooks
- Copy the Signature Secret from the admin panel and paste it in https://dashboard.razorpay.com/app/webhooks
- Save Settings
- If you have previous plans, make sure to Sync Plans. Razorpay option will show up as Credit Card in the checkout page. Do not enable Stripe if using Razorpay.
SMS via Twilio Plugin Paid
SMS via Twilio plugin is a paid plugin that allows your users to send SMS directly from Premium URL Shortener via their Twilio account. It is deeply integrated with Premium URL Shortener, this means you can add it to a plan and only users within the plan can access this feature.
Install SMS via Twilio Plugin
- Extract the zip file downloaded from codecanyon
- Go to your site Admin Plugins All Plugins
- Click on Upload and upload the file named sendsms.zip
- Click on the three dots then Activate
- Go to your plans and enable the feature for each plan you want to enable this
If for some reason, the uploader does not work for you, you can manually extract the file sendsms.zip in storage/plugins/. Make sure the content is in a folder named sendsms. You can then activate it in the admin panel.
Setup SMS via Twilio Plugin
This plugin does not require any global configuration. Once installed and added to plans, each user will need to set it up. The setup is very easy. All they need is a Twilio account and grab their Account SID and Auth Token Under Account API & Tokens
SMS via Twilio Notes
- Twilio requires an international number format including the + sign and country code + area code and phone number. Failing to provide an international number, SMS will not be sent.
- Users can add, import contacts or manage them under Contacts
- Links will be automatically shortened and script will attempt to use existing short links if possible
- New The plugin now has its own API. you will be able to see the API in the Developer API docs (Requires Premium URL Shortener 6.6+)
Crypto.com Plugin Paid
Crypto.com plugin is a paid plugin that allows you to easily collect payments using 200+ cryptos. It is deeply integrated with Premium URL Shortener.
Please note that this plugin requires an Extended License for Premium URL Shortener.
Install Crypto Plugin
- Extract the zip file downloaded from codecanyon
- Go to your site Admin Plugins All Plugins
- Click on Upload and upload the file named crypto.zip
- Click on the three dots then Activate
If for some reason, the uploader does not work for you, you can manually extract the file crypto.zip in storage/plugins/. Make sure the content is in a folder named crypto. You can then activate it in the admin panel.
Setup Crypto Plugin
- Go to Admin Settings Payment Gateway
- Scroll down and you will see Crypto.com Payments
- Enable it and fill the information
- Create an account at https://merchant.crypto.com
- You can find your API keys at https://merchant.crypto.com/developers/api_keys
- Add the specified webhook at https://merchant.crypto.com/developers/webhooks
- Copy the Signature Secret from https://merchant.crypto.com/developers/webhooks
- Save Settings
- If you have previous plans, make sure to Sync Plans.
- You are ready to accept Crypto Payments. Feel free to customize the payment page at https://merchant.crypto.com/settings/business/shop-information
CoinPayments.net Plugin Free
CoinPayments.net plugin is a free plugin that allows you to easily collect payments cryptos. If is very easy to setup and get going. You don't need to sync plans. Just enter the information and that is it.
Please note that this plugin requires an Extended License for Premium URL Shortener.
Please note that this plugin does not automatically charge monthly subscriptions. Users will need to renew manually.
Install CoinPayments Plugin
- Go to your site Admin Plugins All Plugins Directory
- Find the CoinPayments.net Plugin and install it.
- Click on the three dots then Activate
- Go to Admin Settings Payment Gateways and insert your keys
Domain Name Management
Premium URL Shortener supports addition of multiple domain names. Addon domains can either be added by the owner of the site via the admin (via Multiple Domains feature) or by the customer if the customer wishes to use their own domain name (via Custom Domain feature). Getting domain names to work is somewhat tricky might not work on all type of server (especially shared servers) without some changes to the virtual host file.
You need to enable the custom domain name system in Admin > Advanced Settings > Multiple Domain Names for any custom domain or addon domain to work.
Multiple Domains Video Tutorial
You can enable the multiple domains feature if you have more than one domain name. You will allow your users to choose or set a domain name by default. To add your domain names, simply fill the box in the admin section and add one domain name per line including http:// or https://. To set up your domain name, add your domain name to your server and forward all requests to your main using the following code.
Important Requirements
Two important conditions need to be met so domains can work. The way you can meet these conditions differ from server to server but in general you need to make sure:
- You point your domain to the correct server by either using A records to your IP or a CNAME record to your main domain or a subdomain
- You need to make sure the addon domain correctly resolved to the path where the script is installed. If you add the A record correctly and the domain do not point to the script folder, it will not work. In short, your addons domains must be setup exactly the way your main domain does.
Shared Server/cPanel/Plesk
If you are on a shared server, you will have to add the domain name via the "Addon Domain/Domains" tool located in cPanel. It is very important that the Document Root of the domain be the same as the primary domain or where Premium URL Shortener has been installed.
cPanel Domains Video Tutorial (Reference)
Plesk Domains Aliases
Note on Plesk Make sure to toggle off Redirect with the HTTP 301 code
VPS/Dedicated Server
If you are on a dedicated server, you will need to do a small modification to the default apache conf file usually located in /etc/apache2/sites-enabled/ and named 000-default.conf. Open that file and you will see the content shown on the right. You will need to replace the path /var/www/html/ in DocumentRoot and Directory to the path where Premium URL Shortener is installed and restart Apache.
To check if the domain name is working, after visiting the domain you should get a page with a message that says Yes. Your domain name is working. Add it to your account now. If you get any other page, that means the server is handling the domain name and is pointing it to another page.
The instruction for managed VPS works on a typical server running apache and php. If you are using an NGINX server then you will need to manually update the NGINX config file. Similarly if you are using an IIS server, you will need to manually update the configuration.
 <VirtualHost *:80>
        ServerAdmin webmaster@localhost
        DocumentRoot /var/www/html/public/

        <Directory /var/www/html/public>
            Options Indexes FollowSymLinks
            AllowOverride All
            Require all granted
        </Directory>

        ErrorLog ${APACHE_LOG_DIR}/error.log
        CustomLog ${APACHE_LOG_DIR}/access.log combined

        <IfModule mod_dir.c>
            DirectoryIndex index.php index.pl index.cgi index.html index.xhtml index.htm
        </IfModule>

</VirtualHost>
Custom Domains Video Tutorial
Customers can add their own domain name and use it to shorten URLs. This will require some setup. First, as admin, you need to enable Multiple Domain Names in the Admin Settings Advanced Settings. Once that is done, your customers can add their own domain name via the Custom Domain page. They will need to either add an A record or a CNAME record. On your side, you will require some changes before your server can accept their domains.
Important Requirements
Two important conditions need to be met so domains can work. The way you can meet these conditions differ from server to server but in general you need to make sure:
- You point your domain to the correct server by either using A records to your IP or a CNAME record to your main domain or a subdomain
- You need to make sure the addon domain correctly resolved to the path where the script is installed. If you add the A record correctly and the domain do not point to the script folder, it will not work. In short, your addons domains must be setup exactly the way your main domain does.
Shared Server/cPanel/Plesk
If you are on a shared server, you will have to add the domain name via the "Addon Domain/Domains" tool located in cPanel. It is very important that the Document Root of the domain be the same as the primary domain or where Premium URL Shortener has been installed.
cPanel Domains Video Tutorial (Reference)
Plesk Domains Aliases
Note on Plesk Make sure to toggle off Redirect with the HTTP 301 code
VPS/Dedicated Server
If you are on a dedicated server, you will need to do a small modification to the default apache conf file usually located in /etc/apache2/sites-enabled/ and named 000-default.conf. Open that file and you will see the content shown on the right. You will need to replace the path /var/www/html/ in DocumentRoot and Directory to the path where Premium URL Shortener is installed and restart Apache.
To check if the domain name is working, after visiting the domain you should get a page with a message that says Yes. Your domain name is working. Add it to your account now. If you get any other page, that means the server is handling the domain name and is pointing it to another page.
The instruction for managed VPS works on a typical server running apache and php. If you are using an NGINX server then you will need to manually update the NGINX config file. Similarly if you are using an IIS server, you will need to manually update the configuration.
 <VirtualHost *:80>
        ServerAdmin webmaster@localhost
        DocumentRoot /var/www/html/public/

        <Directory /var/www/html/public>
            Options Indexes FollowSymLinks
            AllowOverride All
            Require all granted
        </Directory>

        ErrorLog ${APACHE_LOG_DIR}/error.log
        CustomLog ${APACHE_LOG_DIR}/access.log combined

        <IfModule mod_dir.c>
            DirectoryIndex index.php index.pl index.cgi index.html index.xhtml index.htm
        </IfModule>

</VirtualHost>